Tuesday, July 22, 2014

Baking Fever

On Saturday I decided to make banana bread. The only reason for this was because there were a few banana sitting on the counter and it was turning brown. It is just not our favorite fruit, but for some reason we love buying them! I needed a couple of things so after Laien had his dinner we went for a long walk to the store to grab the ingredients. I love summer days because it is light out till like 830. It was a nice walk and we both enjoyed it!
After our nightly routine---dinner, walk, bath and bedtime...it was time to bake away. It was the most easiest and quickest Banana Chocolate Chip Bread I have ever made with not too many ingredients :D

I knew you were waiting for the recipe. Here it is...

You will need:

  • 3 ripe bananas, smashed
  • 1/2 cup chocolate chips
  • 1/3 cup melted butter
  • 1/2 cup sugar (3/4 cup if you don't use chocolate chips)
  • 1 1/2 cups of flour
  • 1 egg, beaten
  • 1 tsp vanilla extract
  • 1 tsp baking soda
  • dash of salt
Preheat the oven to 350 degrees and grease the loaf pan. Smash the bananas in a bowl and mix in the melted butter. Mix in the sugar, egg and vanilla. Add the baking soda and salt, stir together. Then add the flour, mix well and finally mix in the chocolate chips! Pour batter into the loaf pan and bake 50-55 minutes or until a toothpick comes out clean.

Before


So while it was baking, Ethan and I watched "The Delivery Man." It was funny, alright! I still did not know who Vince Vaughn owed money too, but he was funny. I would give it a 4 1/2 star.

After
It  looked beautiful I dived right into it.
Loved the smell of fresh baked bread :)


Less than 24 hours later...
Well we had it for breakfast
before church, lunch after church
and snack every few minutes 
throughout the day :D


Ethan likes banana bread, but he definitely loved this one. We usually throw out banana bread too because it will sit in our fridge for months. But this was a keeper :D

Today I felt like I needed to make a special treat. I really think I am going through a baking mode here. Chocolate Chip Oatmeal Cookies was what the Kitchen Aide wanted to whip up. I am sure these treats won't last long :-P

It is another easy cheesy.

Ingredients:
  • 1 cup all-purpose flour
  • 1/2 tsp baking powder
  • 1/2 tsp baking soda
  • 1/4 tsp salt
  • 2 cups rolled oats (old-fashioned)
  • 8 tbs (1 stick) unsalted butter, at room temperature
  • 1/2 cup lightly packed light brown sugar
  • 1/2 cup granulated sugar
  • 1 large egg
  • 1/2 tsp vanilla extract
  • 3/4 cup semisweet chocolate chips
Directions:
  • Preheat the oven o 350 degrees.
  • In medium bowl, stir together the flour, baking powder, baking soda, salt and oats.
  • In your Kitchen Aide(if using one), beat the butter, brown sugar and granulated sugar together until well blended. Beat in the egg until smooth and barely fluffy. Add vanilla extract and incorporate into the mix.
  • Gradually add the flour mixture till it is all mixed well. Add the chocolate chips.
  • Drop the balls of dough onto a cookie sheet . Bake for 9-11 minutes.
Love this bad boy!!!


Ready to baaakkkkeeee....


All cozy with each other...


It is delish!!! Guys...I have not been doing good with my diet. But when this momma has a baking fever, diet can wait till next Monday ;) I hope you all are having a great Monday!

~Enjoy~

Thursday, July 10, 2014

My Friend, Chicken!!!

I don't have a lot of friends...here in Grand Junction. When I first moved here in 2007 I enrolled myself into college and found a job right away at a fast food restaurant (I hated it)! I really had no life...all I did was work, school, home...repeat. Ha ha! Then in October of 2008, I got hired to work as a station agent for American Eagle Airlines. I have always wanted to work for the airlines when I was just a little girl, so this was like a dream come true. And let me tell you...it is one of the hardest job to get into. I applied a year before I got hired. And then there's all these background check/security majicky that you have to go through! Life of being in the airline industry. My job was hard and I say this with all honesty. As a station agent you don't just stand at the counter checking in customers and or board the aircraft. You do everything and I mean EVERYTHING!!! I loaded and unloaded bags, marshaled the aircraft in, pushed it back for departure- this means I hook up the plane to what we would call an "aircraft pushback" and drive this pushback with the aircraft attached to it away from the gate for it's departure, checked-in customers, board the flight, do baggage claims, secure the flight, clean the aircraft...you see what I mean when I say EVERYTHING! And those are just a few of the things I did as a station agent. But I enjoyed it a lot and so I worked so many hours. Work was my second home.


Okay so how is this story related to my blog post? Well, you see I have this friend I call CHICKEN...actually, we call each other CHICKEN!!! I love her and am truly grateful that I am someone she calls a friend. I met Liz when I worked for American Eagle airlines and when I came in as a new employee I knew from day one that we will be great friends! She trained me one morning loading bags into the baggage cart and I liked her right away. She was the most organized, efficient person I have ever met in my life. We had something in common and I thought it was cool that we shared several traits-- ORGANIZED, CLEAN FREAK, and what my husband would call "A.D.D." She was a hard worker too and so I loved working with her. She always had a "game plan" (as she would say it) that was very organized so working with her was stress-free and rewarding whenever the job was done. 

She also had a very sarcastic attitude that for some reason I loved. And I dislike sarcasm in any way and form. A very devoted faithful member from church gave a lesson one Sunday and said something that really stood out to me. She said something like this, "I dislike sarcasm and it's a rule in our home that sarcasm is not allowed." I thought that was a great rule and it has become a rule that I try to enforce within our home. I love this sarcasm sign and I am on a hunt for it so I could post it on my front door. Ha Ha! But with Liz, I enjoyed her sarcasm and I loved being sarcastic with her. Maybe its because her sarcasm wasn't too extreme where it can cause ill feelings and be very offensive. They are ones that we can both get a kick out of it laughing and move on to the next sarcastic comment. She is so tight and I could sit whole day with her and be entertained by her black ghetto-ness when it does come out of her. Liz has her own kind of language and I would always end up picking them up because they are just too cool. She is awesome when it comes to that. Some of the phrases that I picked up from her were, "Tight tight baby girl", "Thanks Big Baby", "Yo home slice" and "Nice One Skills". These are just some of them. But there are quite a few that I would probably take a whole hour listing them. She got me hooked on Tyler Perry movies, Madea and we would watch all of them and just laugh our butts off. Quoting Madea was Liz's specialty and one of my favorite...it still is!

She is an amazing friend and I am truly grateful that the Lord guided me to her. She has great faith in God and she is very knowledgeable about His gospel. Liz and I practice two very different religion, but I have always felt very comfortable talking about gospel principles and about God with her. She is a great listener, mentor and is very good at uplifting my spirits when I need it the most. Check her blog out here, she is a great writer too! That is probably why I love her so much. Oh and did I tell you that Liz has the most cleanest mouth? Ok, I'm sure she has a clean mouth! What I am trying to say is that, she is the first black person I have met that DOES NOT CUSS AT ALL, I repeat... SHE DOES NOT CUSS! I was shocked when I first learned this about her. But I am glad I don't have to plug my ear holes when talking with Liz.

We have been through so much in both our lives and it is funny how it is almost so similar. Liz got engaged while I was on my mission. And she had her wedding just a month and a week before I got home. I was bummed that I did not get to celebrate with her on her special day. But from the pictures I've seen, she was the most beautiful bride and looked very happy as she married her very tall, athletic husband. She sure did have fun shaking her booty without me :-P I got married shortly after I got home from my mission too then had Laien 11 months later. My friend Liz had Ms. Kamea just 8 months after I had Laien. We are both mommy's now and it's been nice having a close friend to talk to about basically anything! She is an amazing mother and I admire the dedication and love she has for Lil Kamea. Marriage and motherhood has really kept us on our feet so we haven't really had a chance to hang out. But Liz is such a wonderful friend and she would always try to plan something out for us to do. I told you I have the coolest friend!

You are probably wondering if we've ever had any fights, disagreements or some type of drama in our relationship. Well to tell you the truth, NO! Liz reminded me today of only ONE little fight that we had while working together. And we couldn't remember what it was all about? But it was not a big fight and it did not last long. We think it was just a disagreement on how we both did our job which pissed us both off and we went our separate ways. Ha ha! We did not talk to each other nor did we want to be around each other. We had two cool co-workers that both talked with us separately trying to tell us to get over what we were feeling towards each other. Liz remembered me saying, "Just leave us alone. We both need our time but we will talk later." Oh geez! Sounds like myself back then. Like I said, it did not take long and we were driving to Taco Bell after work for some Fruitista. LoL! And that is why I appreciate and love my friend, Chicken! We have so much in common so we know how to deal with each other. I am truly grateful for her and the beautiful friendship that we have...I value it so much and she is someone very special to me.

So after about six months since the last time we've seen each other, the very thoughtful Liz invites Laien and I to come over for a swim. It was nice seeing her and Kamea and do some catching up. I wish we could just hang out whole day with our babies. Kamea was just a happy baby and smiled the whole time. Laien was very comfortable to be around them, which is usually not the case when he is in an unfamiliar place with people he doesn't know too well. But I am sure Laien knew we were with mommy's best friend and there is no need to be shy or uneasy. We enjoyed it and we are looking forward to create more memorable moments with each other and our babies.


Laien is ready for his 1st swim!


Kamea is so excited and ready to show
Laien how it's done!


My beautiful friend & her daughter :)


We are all done but first,
let's take a selfie!

I love this quote I came across while blogging one day...

We have three types of friends in life:
Friends for a reason, 
Friends for a season,
&
Friends for a LIFETIME!

Liz has fulfilled all three!!! I am truly blessed to have her as a friend, sister and to call her chicken :)

Wednesday, July 9, 2014

Elastic Maxi Skirt with Pockets

Guys! I think I am addicted to sewing. I am so HOOKED I can't seem to leave my sewing machine alone. Ha ha. Well I made another maxi skirt, this time with pockets and a more higher waist. And I LOVE IT! And guess what? I used a bed sheet that I came across while I was thrifting. I loved the pattern and color so heck, let's be creative AND it only cost me a buck!!! So here's the tutorial. I got inspired by this lady who I came across her blog a month ago. So if my tutorial does not make sense, check hers out here.

1. Measure:
Waist + 2-3 inches more- depending
on how full you want the bottom of your
skirt to be.
Elastic: where you want the skirt
to sit. Waist - 2 inches or where
you feel comfortable at.
Length + 6 inches for casing and
hem.


2. Cut your fabric.


3. And then cut in half so you have
two skirt panels.


4. Pockets!!! I bought these
pockets at a yard sale for $0.50. I wanted
to use it for something else so I just used
them as a pattern. 


5. I thought they were too long so I
folded it in half and traced around
to create my own pockets using the
remainder of my fabric.


6. I needed four pockets. (Next time I think I
will just use the original size of the pockets
that I used as a pattern.)


7. Measure from the top of the skirt 6 inches down 
then pin your pockets.


8. Pin the pocket and skirt right sides together.
(The picture doesn't seem like it...that
was the first error I had)


9. Sew the pockets to the skirt panel. 
Just one side only.


10. Iron the seams down so that the 
pocket is on the outside.


11. Pin the skirt panels together 
and the pockets.


12. Sew one side of the skirt make
sure going around the pocket.


13. It should look like this after.
You have a POCKET!!!


14. Measure the top  for the elastic.
I used a 1 1/2 inches elastic so I 
added another 1/2 inch. 


Then of course, Laien decides 
to help delay the project...


15. Iron the top fold for the casing
all the way around. 


16. Stitch away...


17. Pin the remaining two pockets to 
the other side of the skirt.


18. Now let's get to the bottom of
this skirt. Fold about 1/4 inch in and 
do another fold, press with an iron...


19. Then run it through.
Whirrrr.....


20. Now you can attach the other side.
Sewing the two panels together 
making sure you are going 
around the pockets. Also, make
sure you leave an opening on the casing
for the elastic. 


21. Time to run the elastic through.
Pin one end with a safety pin
and run it through the casing.


22. Once you've run the elastic through,
and now have the elastic out on both
ends...Stitch 'em up and close up
your opening. 

***Again, Laien is being very helpful***


 Then it is all done!


Love the pockets!


This boy is such a momma's boy! Won't be surprised if he starts playing dress up by the sewing machine while I'm stitching away. Hope this tutorial made sense. Leave a comment below to tell me what ya think :)


~Only in Ree's Closet~


Monday, July 7, 2014

One Difficult Project

One of the sister missionaries asked if she could give me a skirt for me to refashion. This was a month and a half ago and I finally just finished it a couple of days ago. That's how difficult this project was for me. There were times I felt like just giving up and bringing it in to a professional to fix it.

So here's the original dress. She had cut the dress and brought the bottom part for me to just create a  band for it. I had to ask her to bring me the rest of the dress so I could use it to create the skirt band.


I had to cut 4 inches from the top of the original dress to create the waist band.
After a few adjustments and errors, I was able to attach the band
to the skirt. 


Folded the top of the waist band in and sewed it all around to create
a clean finish. Then created the casing for the elastic band.


Run the elastic through then sew up the opening.


All done  with this skirt! Haha...I spent so much time on this skirt.
Kicked my butt big time...Phew! Glad its done and it looks great.


So when they came for dinner on July 4th we had some extra time for me to take a picture of her wearing the skirt. I love the pattern on the skirt and it went really well with the red blouse she was wearing. The skirt had two pockets on the front so I thought I'd add buttons on the pockets so that it looks FUN.

Saturday, July 5, 2014

DIY Pleated Maxi Skirt

One of my favorite department store is Kohl's. I used to shop there a lot! I still do on occasions, but have not been lately. And when Lauren Conrad launched her clothing line there...I got even more excited to shop there. If you don't know who Lauren Conrad is, check her out here. I love her style and got to know her through a couple of her T.V shows, Laguna Beach and The Hills. Here are some of her styles that I love...


She has really good taste and I love all her clothes!


This is her Chiffon Pleated Maxi skirt that inspired me to create one :D

And guys it is not cheap! Regular prices are ranging between $50 and $60 for just ONE! Unless they are on sale you can get them for half their original price. But still I will not and can not afford to spend $30 on a pair of skirt that I can easily make for so much less! So I went and grabbed me some fabrics and got to work.
This was the only time I went to a fabric store and actually spent $20 total on a couple of fabrics and elastic band. The only exception since I haven't been able to find any chiffon, silk or materials of that sort while thrifting:( I've always wanted a maxi skirt in a blue indigo color and I was so happy when I was able to find it at Hobby Lobby. So here is a step by step DIY! 

What you will need:


And of course...


Start of by taking your measurements.
Waist- where you want the elastic. I want mine high so it was a few inches above my belly button-- the smallest part of my waist. Add an inch for your seam allowance.
Length- How long or short you want your skirt. In my case, I wanted a maxi skirt so I measured from my waist to my ankle. I added a couple inches for the hem.

Here were my measurements:
Waist: 27 inches + an inch (Elastic)
             29 inches (Fabric) I wanted a fuller bottom.
Length: 38 1/2 inches + 2 inches


Once you have your measurement,
you are now ready to start!
Fold your fabric in half.


Measure & cut your fabric.


Ironing the pleats!
Unfold your fabric and starting from one end measure about 1 1/2 
inches and fold. Once folded, iron it from top to bottom.


Have you ever made a paper fan before?
It is the same process only this time you are working with a fabric.


Fold and press with iron until you have a long strip like
the picture below.


When you open the fabric, it should look this. (Picture Below)
You can now sew both ends together.
You will have a big tube with an opening on both sides.


Fold the bottom hem and pin all around. 
I did the top as well since it's a silk material
to prevent it from shredding apart
when it is washed.


Sew the hem all around. 


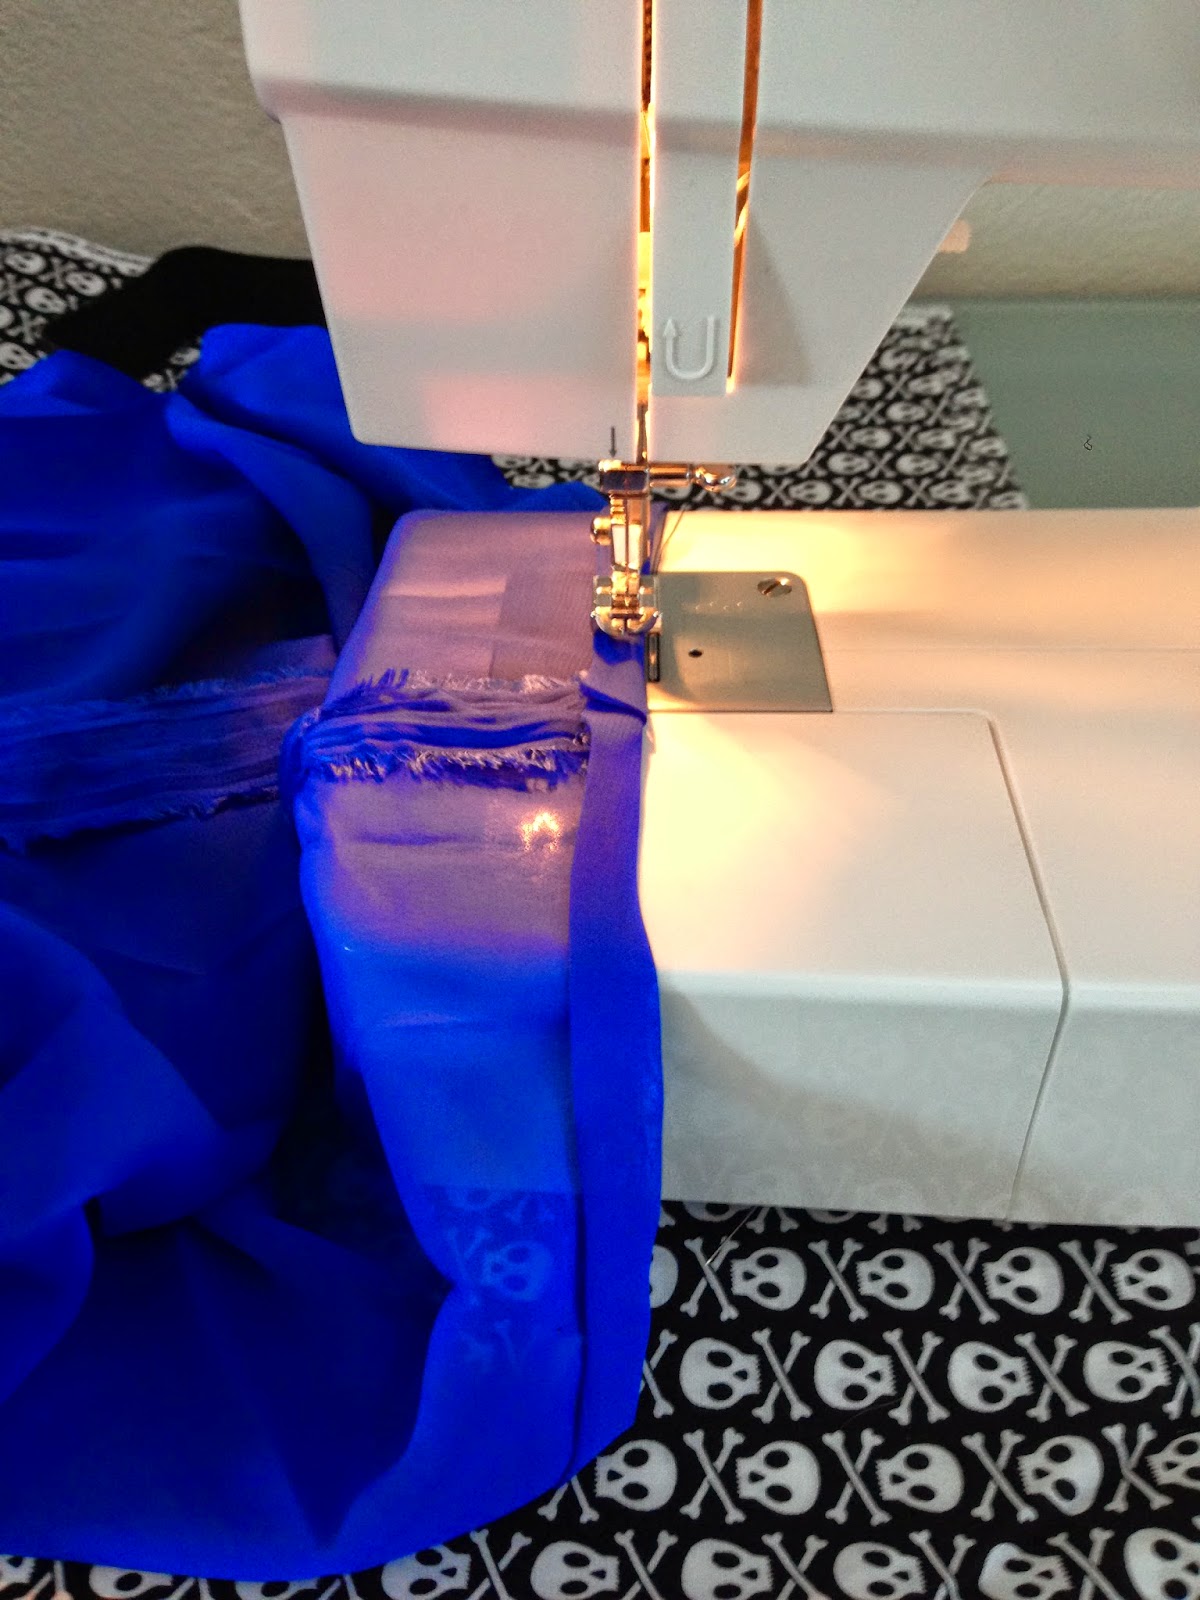
Okay guys here is where things changed a little! When I was about ready to attach the elastic to the skirt I realized that because my measurements were off a little, it wouldn't  work. Remember I had cut the width of my fabric at 29 inches and my elastic band was 27 inches? Yes, that was the problem. But I had a legitimate reason for that...I wanted the bottom of my skirt to be a little fuller so I can at least walk around in it! I was so sad because I didn't want to take it all apart and redo the whole thing again. But I am glad this wasn't the first maxi dress that I've done and I have learned from my previous projects some tricks and ways to fix little problems like these. So the solution to my problem was an elastic thread!

Here it is...so I changed my bobby thread 
to this and sewed the top of the skirt all around.
As you sew the fabric will begin to ruffle.
The skirt began to take shape and
I was now able to attach the elastic!


Sewing the elastic to the skirt.
I used the smallest zig-zag stitch all around. 
Pull the elastic towards you as you sew.


And Viola! Here it is without
the lining.


I was so excited when it was all done! The black polyester will be the lining of the skirt. As you can see from the picture, I have not attached it yet. But since I wanted to wear this for the 4th of July, I just slipped in a black thin skirt under and it worked just fine. The lining would have to be another project because I have not done any skirt lining before and I still need to do some research and figure it all out. Haha! But I was so proud of myself because it only took me a day and half to fix this cute skirt :) 
But do you get the picture? You can save a ton of money by making your own clothes! You might run into some problems here and there, few errors from time to time...but it is so much FUN! Hope you enjoy this DIY :D 


~Only in Ree's Closet~